
If you love chocolate bars but want a healthier alternative, this Healthy Kit Kat Recipe is the perfect solution. Inspired by the classic chocolate wafer candy bar, this homemade version offers the same crispy layers and rich chocolate coating but uses cleaner ingredients and less processed sugar.
In this article, you’ll learn how to prepare crispy homemade Kit Kat bars, the ingredients you need, and helpful tips to achieve the perfect crunchy texture.
What Makes This Healthy Kit Kat Recipe Different?
Unlike conventional candy bars, this healthier version focuses on simple and wholesome ingredients. Instead of refined flour and artificial additives, the recipe uses nutrient-rich alternatives.
Here are some of the main differences:
- Uses almond flour instead of refined wheat flour
- Sweetened with coconut sugar or maple syrup
- Made with dark chocolate instead of milk chocolate
- Contains healthy fats like coconut oil
- Completely gluten-free and dairy-free
These adjustments make the dessert suitable for people following gluten-free, paleo, or vegan diets.
Ingredients for Healthy Kit Kat Bars
This recipe is divided into three components: the crispy cookie layers, the chocolate filling, and the chocolate coating.
1. Ingredients for the Crispy Cookie Layers
- 1¼ cups almond flour
- 3 tablespoons coconut sugar
- 1 tablespoon ground flaxseed
- ⅛ teaspoon salt
- 3 tablespoons melted coconut oil
- 1 tablespoon water
- 1 teaspoon vanilla extract
These ingredients create thin, crunchy cookies that mimic the classic wafer layers of traditional Kit Kat bars.
2. Ingredients for the Chocolate Filling
- ¾ cup dark chocolate chips
- 3 tablespoons creamy peanut butter (or sunflower butter)
This mixture forms the creamy chocolate layer between the cookies.
3. Ingredients for the Chocolate Coating
- 1 cup dark chocolate chips
- 1 tablespoon coconut oil
The coating gives the bars their iconic chocolate shell.
How to Make a Healthy Kit Kat Recipe
Making these homemade chocolate bars requires several steps, but the process is simple and rewarding.
Step 1: Prepare the Cookie Dough
Preheat your oven to 350°F (175°C).
In a mixing bowl, combine:
- almond flour
- coconut sugar
- ground flaxseed
- salt
Mix thoroughly. Then add the wet ingredients:
- melted coconut oil
- water
- vanilla extract
Stir until a soft dough forms.
Step 2: Roll and Cut the Cookie Layers
Place the dough between two sheets of parchment paper and roll it thin using a rolling pin.
The dough should be about ⅛ inch thick to mimic the crisp wafer texture.
Using a knife or pizza cutter, slice the dough into small rectangles approximately the size of Kit Kat fingers.
Transfer the parchment paper with the dough onto a baking sheet.
Step 3: Bake the Cookies
Bake the cookies for 8 to 10 minutes until lightly golden.
After baking:
- allow them to cool on the tray
- transfer them to a cooling rack
The cookies will become crisp as they cool.
Step 4: Prepare the Chocolate Filling
In a small saucepan or microwave-safe bowl:
- Melt the dark chocolate slowly.
- Stir in the peanut butter until smooth.
Allow the mixture to cool slightly until it reaches a spreadable consistency.
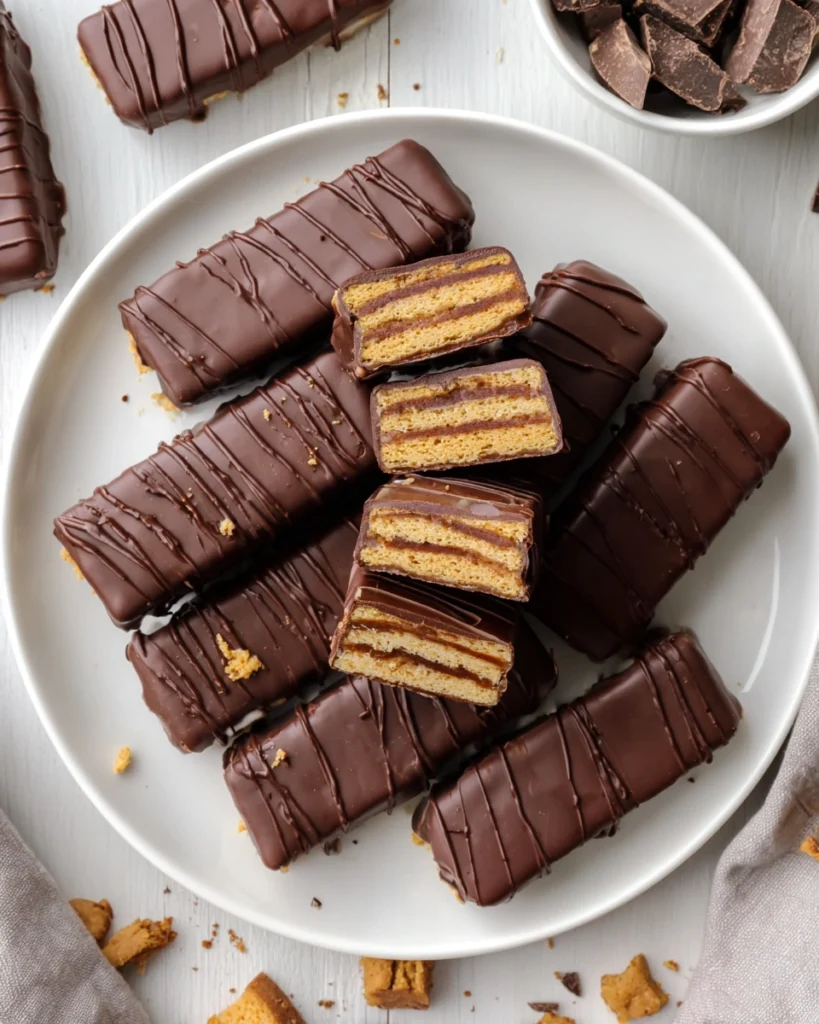
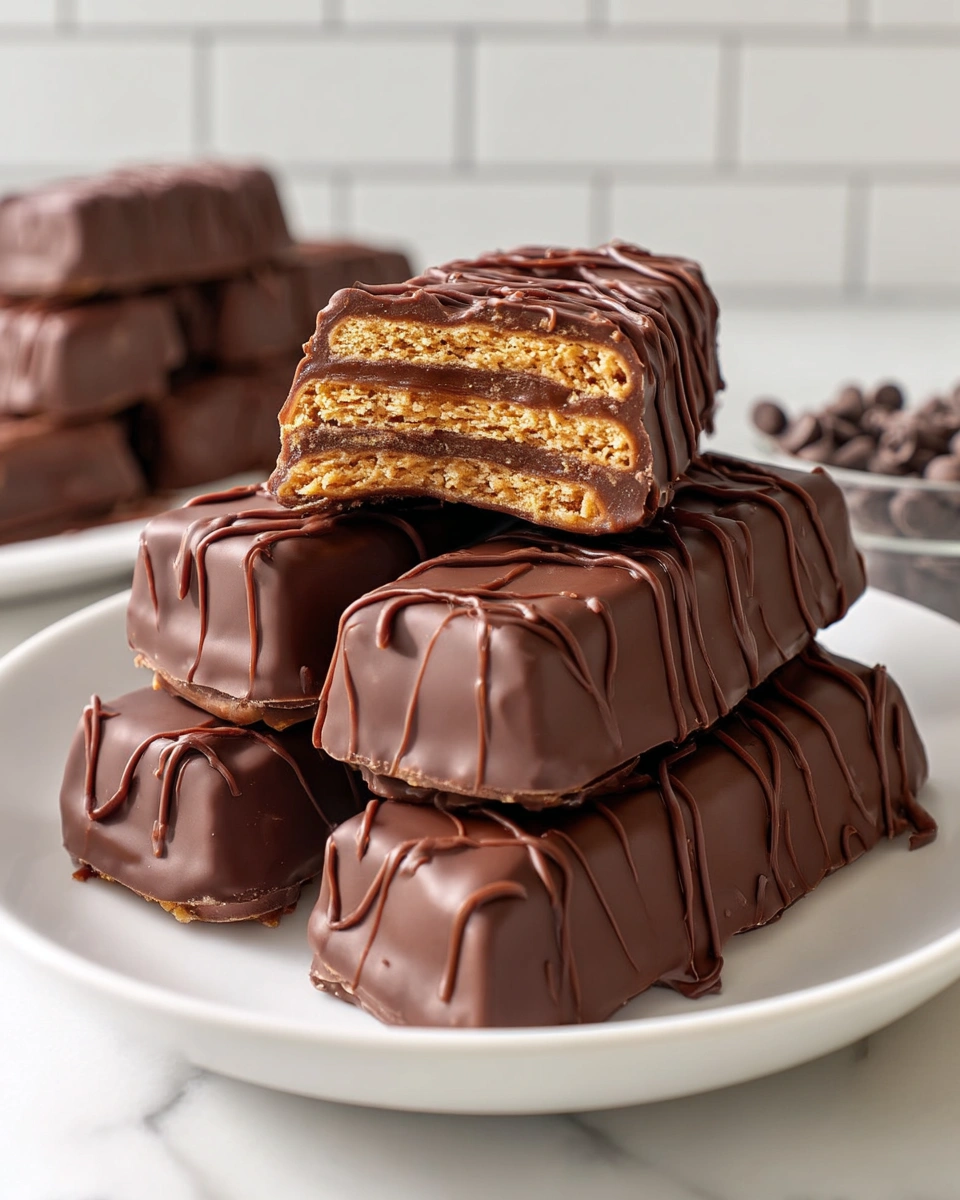
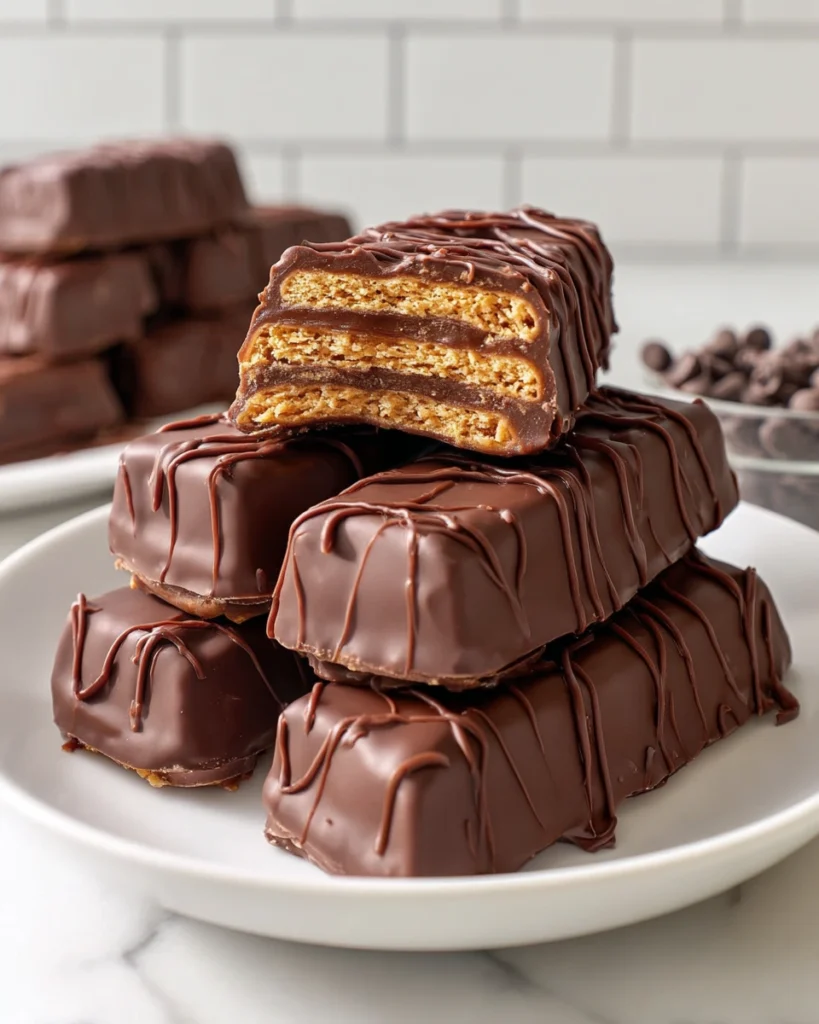
Step 5: Assemble the Kit Kat Bars
Each homemade bar consists of three cookie layers.
Assembly process:
- Place one cookie on a flat surface.
- Spread a thin layer of chocolate filling.
- Add another cookie on top.
- Spread another layer of filling.
- Finish with a third cookie layer.
Repeat until all cookies are assembled.
Place the bars in the freezer for about 15 minutes to allow the filling to firm up.
Step 6: Prepare the Chocolate Coating
In a saucepan or microwave:
- Melt dark chocolate chips.
- Add coconut oil to thin the chocolate.
Stir until smooth.
Step 7: Coat the Bars in Chocolate
Remove the assembled bars from the freezer.
Using a fork:
- Dip each bar into the melted chocolate.
- Rotate to coat evenly.
- Let excess chocolate drip off.
Place the bars on a parchment-lined tray.
Allow them to set in the refrigerator for 10–15 minutes.
Storage Tips
Homemade Kit Kat bars should be stored in an airtight container.
Storage options:
- Refrigerator: up to 2 weeks
- Freezer: up to 2 months
Many people prefer eating them slightly chilled because the texture becomes even crispier.
Nutritional Advantages
Compared with commercial candy bars, this healthy version offers several benefits:
1. Less Refined Sugar
Natural sweeteners such as coconut sugar provide sweetness with fewer additives.
2. Healthy Fats
Coconut oil and nut butters supply healthier fats than processed vegetable oils.
3. Gluten-Free Option
Almond flour replaces wheat flour, making the dessert suitable for gluten-free diets.
4. Higher Nutrient Content
Ingredients like flaxseed and almond flour provide fiber, protein, and minerals.
Tips for the Best Homemade Kit Kat Bars
To achieve the best results, follow these expert tips:
Roll the cookies very thin
Thin cookies create the authentic crispy wafer texture.
Let the cookies cool completely
Warm cookies may break during assembly.
Use high-quality dark chocolate
A chocolate with 70% cocoa gives the best flavor.
Freeze before dipping
This prevents the layers from separating during coating.
Variations of the Healthy Kit Kat Recipe
You can customize this recipe easily.
Peanut-Free Version
Replace peanut butter with sunflower seed butter.
Nut-Free Version
Use tigernut flour instead of almond flour.
Extra Crunch
Add crushed rice cereal to the filling.
Salted Chocolate Version
Sprinkle a pinch of sea salt on top of the chocolate coating.
Final Thoughts
This Healthy Kit Kat Recipe proves that you can enjoy your favorite chocolate bar without relying on heavily processed ingredients. By combining crispy almond flour cookies, creamy chocolate filling, and a rich dark chocolate coating, you get a dessert that is both satisfying and more wholesome.
Whether you follow a gluten-free, vegan, or paleo diet, these homemade chocolate bars are a delicious treat to keep in your freezer. Once you try them, you may find yourself choosing this healthier version over the traditional candy bar.