
Introduction: What Makes Red Velvet Brownies So Special?
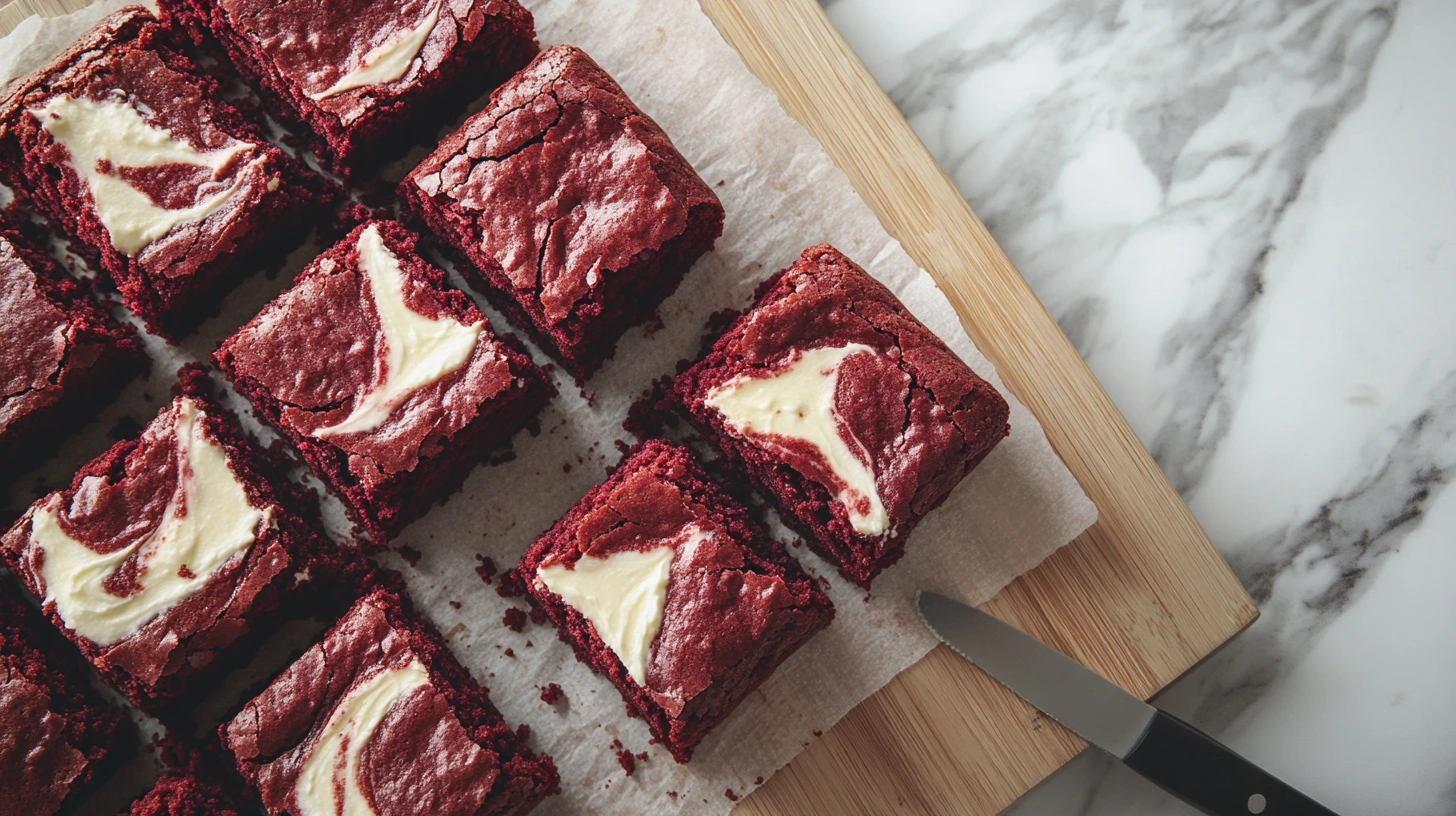
Red velvet brownies bring together the rich chocolate taste of classic brownies with the signature tangy sweetness of red velvet cake. They have a smooth, fudgy texture that melts in your mouth, balanced by a hint of vanilla and a swirl of creamy cheesecake.
These homemade red velvet brownies are the perfect treat for any occasion. Whether you’re baking for Valentine’s Day, a Christmas party, or just to satisfy a sweet craving, this easy red velvet brownie recipe is guaranteed to impress.
If you love red velvet cheesecake brownies or red velvet swirl brownies, this recipe will become a go-to in your kitchen. Follow along to learn how to make these moist red velvet brownies from scratch.
Ingredients You’ll Need
For the Red Velvet Brownie Batter:
- ½ cup (1 stick) unsalted butter, melted
- ¾ cup granulated sugar
- ¼ cup brown sugar
- 2 large eggs
- 1 teaspoon vanilla extract
- 1 tablespoon red food coloring for baking
- 1 teaspoon vinegar in red velvet brownies (white or apple cider)
- ¾ cup all-purpose flour
- ¼ cup cocoa powder for red velvet brownies (Dutch-processed or natural)
- ½ teaspoon salt
For the Cheesecake Swirl:
- 8 ounces cream cheese frosting for brownies, softened
- ¼ cup granulated sugar
- 1 egg yolk
- ½ teaspoon vanilla extract
Optional: Add white chocolate chips in brownies for extra sweetness and texture.
Step-by-Step Instructions
1. Making the Brownie Batter
- Preheat the oven to 350°F (177°C). Line an 8-inch square baking pan with parchment paper for easy removal.
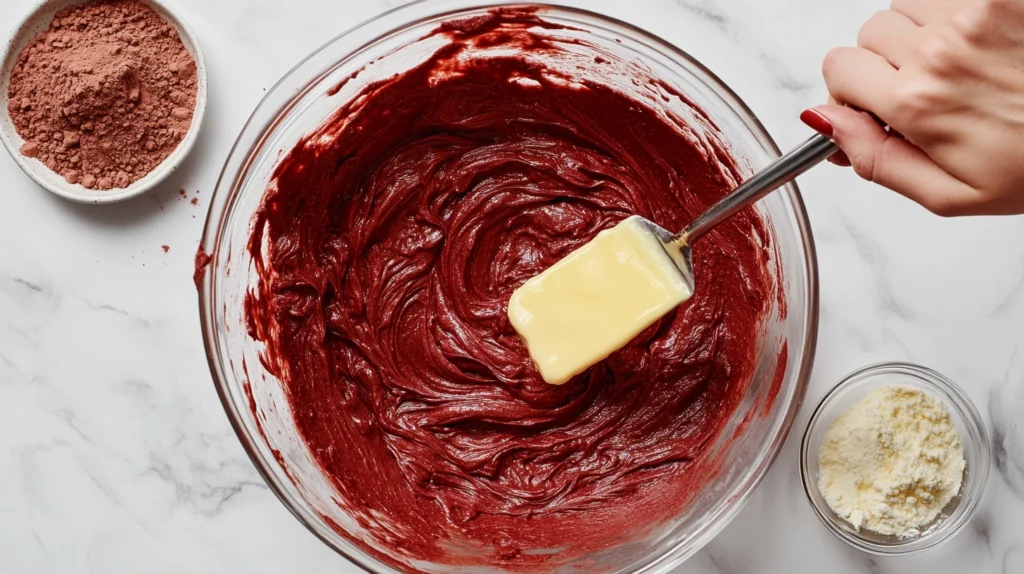
- In a mixing bowl, whisk together the melted butter, granulated sugar, and brown sugar until smooth.
- Add the eggs, vanilla extract, red food coloring, and vinegar. Whisk until fully combined.
- Sift in the flour, cocoa powder, and salt. Gently fold everything together using a rubber spatula. Do not overmix, as this can affect the texture.
2. Preparing the Cheesecake Swirl
- In a separate bowl, beat the softened cream cheese, sugar, egg yolk, and vanilla extract until smooth and creamy.
3. Assembling & Swirling the Brownies
- Pour the red velvet brownie batter into the prepared pan, spreading it evenly.
- Dollop spoonfuls of the cream cheese mixture over the brownie batter.
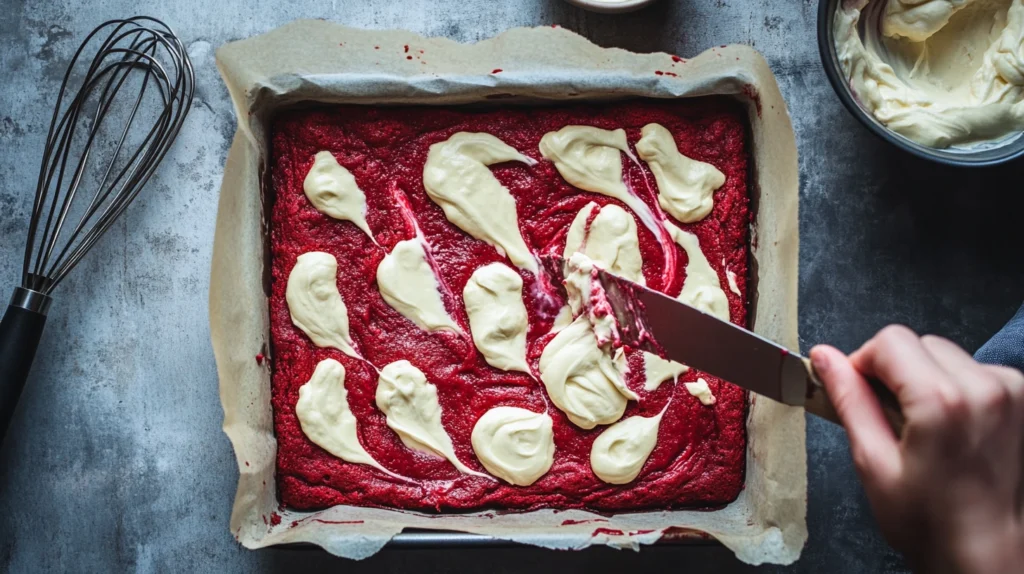
Use a knife or skewer to create a marbled swirling cream cheese in brownies effect.
4. Baking to Perfection
- Bake for 28-32 minutes or until a toothpick inserted in the center comes out with a few moist crumbs. If the batter is still wet, bake for a few more minutes.
- Allow the brownies to cool completely before slicing to achieve the best gooey vs cakey brownies texture.
Tips for the Best Red Velvet Brownies
- For a fudgier texture: Use more butter and slightly underbake the brownies.
- For a cakier texture: Increase the flour slightly.
- For a deeper chocolate flavor: Use Dutch-processed cocoa vs natural cocoa for a richer taste.
- Skipping the red food coloring? The brownies will taste the same but won’t have the classic red hue.
Variations & Fun Twists
- Red Velvet Brownies with Cream Cheese Frosting – Instead of swirling, spread a thick cream cheese frosting for brownies on top after baking.
- Gluten-Free Red Velvet Brownies – Swap all-purpose flour with a 1:1 gluten-free baking mix.
- White Chocolate Red Velvet Brownies – Stir in white chocolate chips in brownies for extra texture.
- High-Altitude Adjustments – Reduce the sugar slightly and bake at 325°F (163°C) for better results.
How to Store & Freeze Red Velvet Brownies
- At Room Temperature: Store in an airtight container for up to three days.
- Refrigerated: Keeps fresh for up to six days in the fridge.
- Freezing Instructions: Wrap each brownie individually and freeze for up to two months. Thaw in the refrigerator overnight before serving.
Serving Suggestions: The Best Ways to Enjoy Them
These homemade red velvet brownies are perfect for:
- Valentine’s Day – A romantic red dessert that makes a great gift.
- Christmas Parties – The red and white swirls make them festive and fun.
- Holiday Baking – A crowd-pleaser at family gatherings and celebrations.
For extra indulgence, serve with a scoop of vanilla ice cream or drizzle with melted chocolate.
More Delicious Red Velvet Desserts to Try
If you love these red velvet cheesecake brownies, you might enjoy these other treats:
- Try these soft and chewy cream cheese chocolate chip cookies for another rich and decadent dessert. https://myworldwiderecipe.com/wp-admin/post.php?post=1268&action=edit
- If you love brownies, you might also enjoy these sweet potato brownies – a healthier alternative with just four ingredients. https://myworldwiderecipe.com/wp-admin/post.php?post=333&action=edit
- Pair your red velvet brownies with a slice of apple and pear pie for a well-rounded dessert spread. https://myworldwiderecipe.com/wp-admin/post.php?post=636&action=edit
FAQs About Red Velvet Brownies
1. Can I make red velvet brownies without food coloring?
Yes. The brownies will not have the signature red color but will still have the same delicious flavor.
2. How do I get a fudgy brownie texture?
Use more butter and slightly reduce the baking time for a gooier consistency.
3. What’s the difference between red velvet cake and brownies?
Red velvet cake is light and fluffy, while red velvet brownies are dense, chewy, and fudgy.
4. Can I freeze red velvet brownies?
Yes. Wrap them tightly and freeze for up to two months.
5. Why do you add vinegar to red velvet desserts?
Vinegar enhances the red color, adds a mild tang, and reacts with cocoa powder for that classic red velvet flavor.
Getting the Perfect Texture in Red Velvet Brownies
The texture of red velvet brownies can range from fudgy to cakey, depending on how you mix the ingredients and adjust the baking time. If you want your brownies to have that melt-in-your-mouth consistency, follow these simple tips.
How to Get a Fudgy Brownie Texture
- Use more butter and slightly reduce the amount of flour.
- Do not overbake. The center should be slightly underdone when you take them out of the oven.
- Let the brownies cool completely before cutting to keep them dense and chewy.
How to Get a Cakier Texture
- Add a little more flour and an extra egg to create a lighter, more structured crumb.
- Bake for a few extra minutes to allow the brownies to set completely.
- Whisk the eggs and sugar longer to incorporate more air, which helps lift the brownies.
The choice is yours—gooey vs cakey brownies comes down to personal preference.
Why Vinegar is Used in Red Velvet Brownies
If you’ve ever wondered why vinegar is in red velvet brownies, there’s a good reason for it. Traditionally, red velvet desserts rely on a mild acid to enhance the cocoa flavor and help develop the deep red color.
What Does Vinegar Do in Red Velvet Brownies?
- It reacts with cocoa powder, enhancing the chocolate flavor.
- It helps keep the brownies moist and tender.
- It preserves the bright red hue when used with red food coloring for baking.
While vinegar may seem like an odd ingredient in classic red velvet brownies, it plays a key role in creating the signature flavor and texture.
Common Baking Mistakes and How to Fix Them
Even if you follow the recipe perfectly, small mistakes can happen. If your red velvet brownies didn’t turn out as expected, don’t worry. Here’s how to fix common issues.
1. Brownies Turned Out Dry or Overbaked
- Solution: Reduce baking time by 2-3 minutes and check for doneness with a toothpick. If it comes out with moist crumbs, they’re ready.
2. Brownies Didn’t Rise Properly
- Solution: Make sure your eggs are room temperature and that you’re not overmixing the batter.
3. The Cream Cheese Swirl Didn’t Set Well
- Solution: Use full-fat cream cheese and avoid overmixing it with the brownie batter. Swirl gently for the best results.
By following these simple adjustments, you’ll get the best red velvet brownies recipe every time.
How to Store and Freeze Red Velvet Brownies Properly
Once you’ve baked a delicious batch of homemade red velvet brownies, you’ll want to store them correctly to keep them fresh.
Storing at Room Temperature
- Place brownies in an airtight container and keep them at room temperature for up to 3 days.
- Avoid storing them in a warm or humid area, as they may become too soft.
Refrigerating for Longer Storage
- If you want to extend their shelf life, store them in the refrigerator for up to 6 days.
- Wrap them individually in plastic wrap to maintain their moist red velvet brownies texture.
Freezing for Later
- If you want to freeze red velvet brownies, wrap them tightly in plastic wrap and place them in a freezer-safe bag.
- They will stay fresh for up to 2 months.
- When ready to eat, let them thaw in the fridge overnight or at room temperature for an hour.
By using these storage techniques, your red velvet swirl brownies will taste just as good days after baking.
Perfect Pairings for Red Velvet Brownies
These classic red velvet brownies are rich and indulgent on their own, but pairing them with the right flavors can take them to another level.
Best Drinks to Serve with Red Velvet Brownies
- Hot Coffee: The bold flavor of coffee balances the sweetness of the brownies.
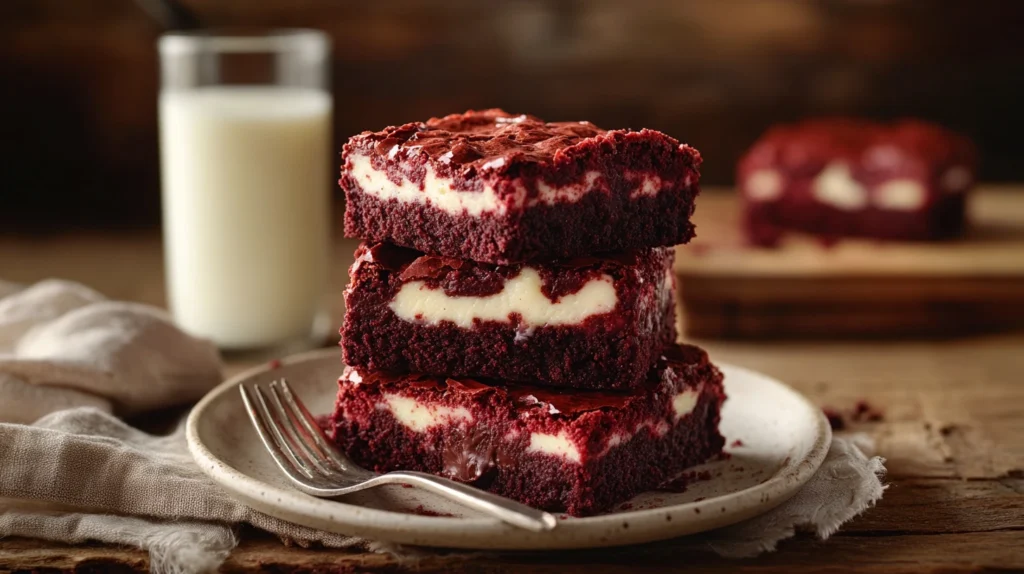
- Cold Milk: A timeless pairing that makes every bite even creamier.
- Vanilla Latte: A touch of vanilla brings out the subtle flavors in the red velvet.
Desserts to Pair with Red Velvet Brownies
- Cream Cheese Chocolate Chip Cookies: The cream cheese in the cookies complements the cheesecake swirl in the brownies.
- Apple and Pear Pie: The fresh fruit flavors contrast beautifully with the rich chocolate taste.
- Sweet Potato Brownies: A healthier option for when you want something lighter.
These pairings will elevate your homemade brownie recipe into an unforgettable dessert experience.
Red Velvet Brownies for Special Occasions
One of the best things about red velvet brownies is that they’re perfect for celebrations. Whether it’s a holiday, a party, or just a special treat, these brownies always impress.
Valentine’s Day Red Velvet Brownies
The red color and creamy cheesecake swirl make these brownies a romantic dessert. Wrap them in a gift box or serve them with fresh strawberries for an extra special touch.
Christmas Red Velvet Brownie Recipe
The festive red and white swirls make these brownies a great addition to holiday dessert tables. Sprinkle them with powdered sugar or crushed peppermint for a wintery feel.
Red Velvet Desserts for Parties
For birthdays or celebrations, you can bake these brownies in a larger batch and cut them into bite-sized squares for easy serving. They’re guaranteed to be a crowd favorite.
No matter the occasion, these red velvet cream cheese brownies will be the highlight of the dessert table.
Special Bonus for Our Readers
Since you’ve made it this far, here’s something special just for you.
Exclusive Baking Cheat Sheet – Perfect Brownie Texture Guide
If you’ve ever struggled with brownies turning out too dry, too gooey, or not quite right, this guide is exactly what you need. I’ve put together a free downloadable cheat sheet that gives you expert tips on how to adjust ingredients and baking times to achieve the perfect brownie texture.
What You’ll Get
- A guide to fudgy vs. cakey brownies and how to get the texture you want
- Ingredient swaps to customize your red velvet brownies
- The best baking times and temperatures for different textures
- Mix-ins and flavor combinations to make your brownies unique
How to Get It
Simply leave a comment below sharing your favorite brownie texture—whether it’s gooey, fudgy, or cakey—and I’ll send the cheat sheet straight to your inbox.
Thank you for being part of this baking community. Enjoy your red velvet brownies!
Final Thoughts: Make These Red Velvet Brownies Today!
This easy red velvet brownies recipe is a must-try for any dessert lover. The combination of rich chocolate, velvety texture, and cheesecake swirl creates an irresistible treat that’s perfect for any occasion.
Whether you’re baking for a special celebration, looking for a Valentine’s Day dessert, or just craving something sweet, these homemade red velvet brownies will not disappoint.
Now it’s time to gather your ingredients, preheat your oven, and start baking. Once you try these red velvet swirl brownies, they’ll become a go-to in your kitchen.
If you made this recipe, be sure to share your experience. Let us know in the comments how your fudgy red velvet brownies turned out!