
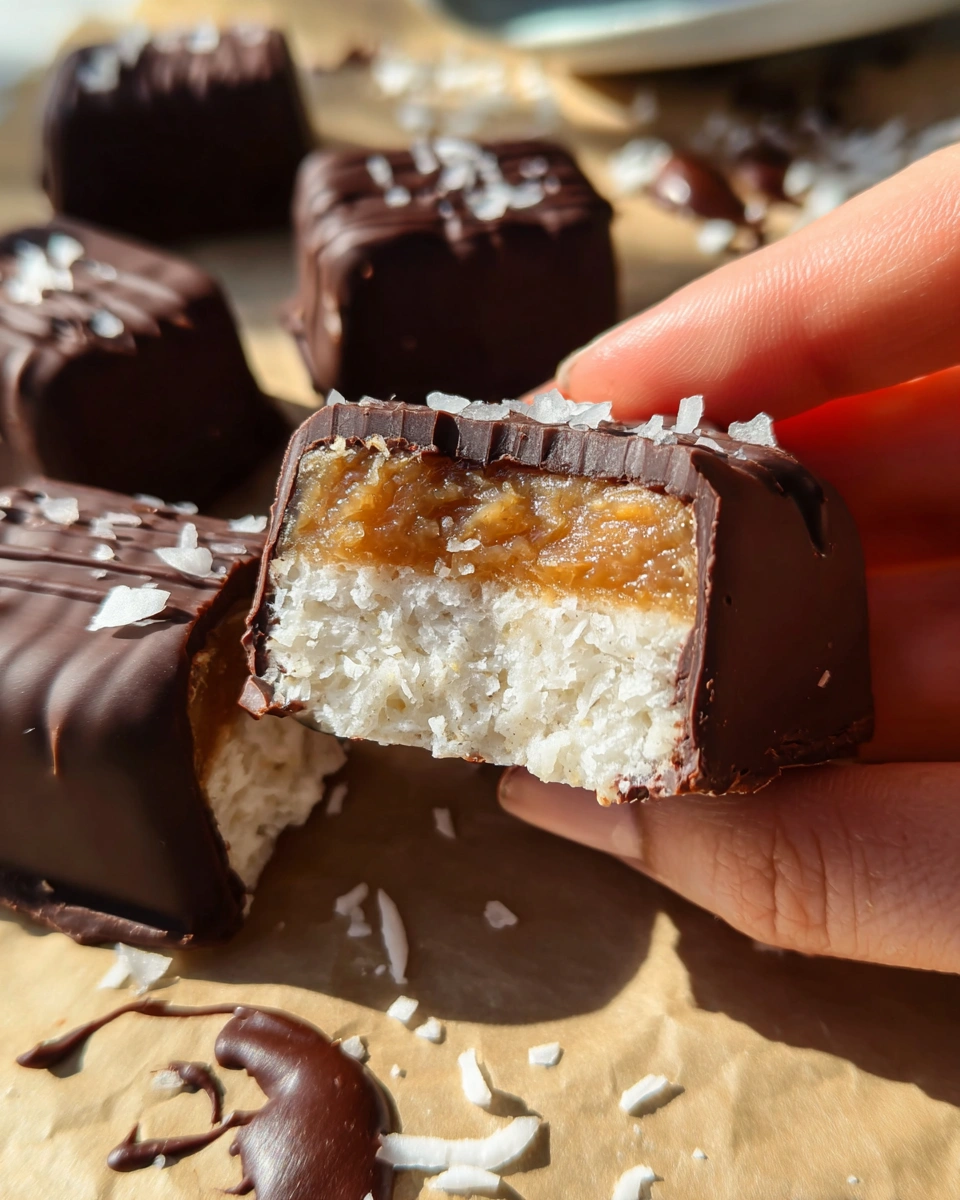
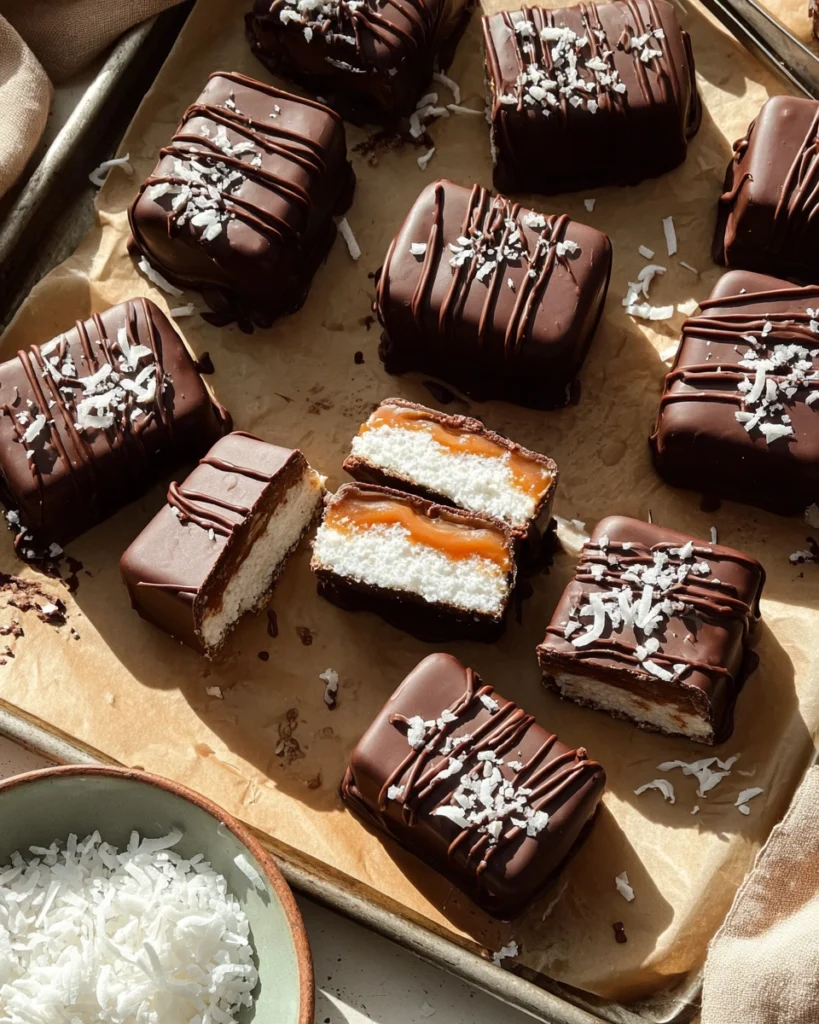
If you love the rich combination of coconut, caramel, and chocolate, these Vegan Coconut Caramel Bars will quickly become one of your favorite desserts. They are indulgent yet made with simple plant-based ingredients, giving you a healthier alternative to traditional candy bars.
Best of all, this recipe is no-bake, which means you can prepare it quickly with minimal equipment.
Why You’ll Love These Vegan Coconut Caramel Bars
These bars are popular on vegan dessert blogs for several reasons:
- Completely vegan and dairy-free
- Naturally gluten-free
- Made with simple whole-food ingredients
- No baking required
- Perfect for snacks, dessert, or meal prep
The combination of chewy coconut, gooey caramel, and rich dark chocolate creates a dessert that tastes like a gourmet candy bar but with healthier ingredients.
Ingredients
Coconut Base
- 1 cup coconut cream (thick part of canned coconut milk)
- 2 cups unsweetened shredded coconut
- 2 tablespoons maple syrup
- 1 teaspoon vanilla extract
Caramel Layer
- 1 cup Medjool dates, pitted
- 2 tablespoons coconut oil
- 1 teaspoon vanilla extract
- Pinch of sea salt
Chocolate Coating
- 200 g vegan dark chocolate
- 1 tablespoon coconut oil
Optional topping: flaky sea salt or shredded coconut.
Recipes often use dates blended with oil or nut butter to create a natural caramel flavor without refined sugar.
Kitchen Equipment
- Food processor or blender
- Mixing bowl
- Spatula
- Loaf pan or square baking dish
- Parchment paper
How to Make Vegan Coconut Caramel Bars
1. Prepare the Coconut Base
Line a loaf pan with parchment paper.
In a large bowl, combine coconut cream, maple syrup, and vanilla extract. Stir well until smooth.
Add the shredded coconut and mix until fully combined.
Press the mixture firmly into the bottom of the lined pan to create an even layer.
2. Make the Date Caramel
Soak the dates in hot water for about 5 minutes to soften them.
Drain the water and place the dates into a food processor.
Add coconut oil, vanilla extract, and a pinch of salt.
Blend until the mixture becomes smooth, sticky, and caramel-like.
3. Assemble the Layers
Spread the caramel evenly over the coconut base.
Smooth it with a spatula.
Place the pan in the freezer for about 3–4 hours or until the bars are firm enough to slice.
4. Cut the Bars
Remove the pan from the freezer and lift the slab using the parchment paper.
Slice into 12–16 rectangular bars.
5. Coat with Chocolate
Melt the dark chocolate and coconut oil together until smooth.
Dip each bar into the melted chocolate or drizzle the chocolate on top.
Place the coated bars on parchment paper and let the chocolate set in the refrigerator.
Storage Tips
These bars store very well.
- Refrigerator: up to 2 weeks in an airtight container
- Freezer: up to 3 months
Let them sit at room temperature for a few minutes before serving for the best texture.
Recipe Variations
You can easily customize this recipe:
1. Salted Caramel Bars
Add a sprinkle of flaky sea salt on top.
2. Nutty Coconut Bars
Mix crushed almonds, pistachios, or cashews into the coconut layer.
3. Protein Coconut Bars
Add 2 tablespoons of vegan protein powder to the coconut mixture.
4. Coconut Caramel Energy Bars
Add oats or chia seeds to make them more filling.
Nutrition Benefits
Although they taste like candy bars, these vegan coconut caramel bars contain nutritious ingredients:
- Coconut: healthy fats and fiber
- Dates: natural sweetness with minerals and antioxidants
- Dark chocolate: rich in polyphenols
Compared with traditional caramel desserts, date-based caramel avoids refined sugar and can offer a more wholesome alternative.
Final Thoughts
Vegan Coconut Caramel Bars are the perfect combination of rich, chewy, and chocolatey flavors. They are simple to prepare, require no baking, and can be made ahead of time for snacks or desserts throughout the week.
If you enjoy homemade vegan treats, these bars are an excellent recipe to add to your collection.